It’s that time of year! A strange time where we notice that we need to clean out and
SIMPLIFY our lives a little bit, but never really get motivated to do it. This year, LET’S GET MOTIVATED! We’re not talking about your whole
house, let’s not get ahead of ourselves now, we’re just talking about some
spring beauty cleaning. You know
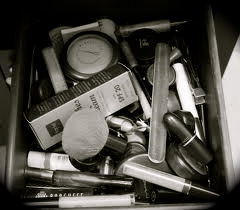
what I’m talking about…that makeup drawer that has turned into an explosion of
brushes, old lipstick tubes, and a coating of powder foundation over everything…time
to give your beauty tools a make over!!
“OUT WITH THE OLD”
DO NOT get overwhelmed. Turn on some music (I would recommend Adele, but that’s just
me). Now, let’s start with the
basics. Get a trash bag and start
by sifting through your make-up drawer (or bag) to throw things out.
Key things to focus on throwing out:
v ANY
makeup you haven’t used or worn in the last year (yes, it’s time to get rid of
that blue eyeshadow that you thought would come back in style).
v Notice
that your lipstick tubes are all just one or two uses away from being
done? GET RID OF THEM NOW – if you
love the color enough to hold onto it all this time, just buy a new one! Same goes for blush, bronzer, and
eyeshadows. If you have held onto
it because you think you still may want to scrape it out of the corners of the
case – it’s time to decide: GET RID OF IT FOREVER – or – GET RID OF IT AND
REPLACE IT. Just remember we are
doing this with the goal of simplifying.
v This
also goes for all of those eyeliners that you have that are shorter than your
pinky finger. Try to get it down
to one or two eyeliners in your drawer AT MOST. Any more than that and you are probably just letting bacteria
build on them from sitting too long.
If you have mascara that is more than 6 months old – it’s trash.
v Believe
it or not, foundations and concealers also go bad. If you have had some for longer than a year – they are most
likely expired. They begin to
break down and can end up being not so healthy to put on your skin. Why risk a break out? Throw it in the
trash start over with a new one (remember, you only need to do this once a
year). Try to limit yourself to
have one concealer (a little lighter than your skin color to cover up
blemishes) and two shades of foundation (one for the winter when your skin is
lighter, and one for the summer when you’re nice and tan). Keeping it this simple helps save space
in your drawer and MONEY!
v Throw
out any old makeup sponges. No
debating that. It’s like, $2 for a
bag of new ones at CVS.
v Makeup
brushes can get the dirtiest of all.
If your brush is completely fanned out, looking like a truck ran it over
a couple of times, has shortened, broken, or losing brush hairs (you know who
you are) – it’s time to let go.
That’s right. I know you
loved your brushes and they have been good to you, but really, it’s not good
for your skin, and it probably hurts to use on your face! Trust me, when you replace your blush
or foundation brush with a brand spankin’ new one, you will notice how soft
your brush may have once been – and you will never look back.
CLEANING
Now that you have thrown out all that is old and disgusting,
it’s time to clean the things you actually are still using.
v First,
grab a wet towel and start pulling out your makeup and makeup brushes you still
know you ABSOLUTELY use, and are relatively updated (again, a good rule of
thumb is if you have bought it in the last 6-8 months at the longest). Wipe these all clean of makeup that may
have gotten on them and coated them over the years. Because I use powder foundation, I have noticed a thin layer
of brown powder over EVERYTHING in my drawer. Whatever is on it, the wet towel can usually get things
looking a little bit neater.
If it is so dirty that you
can’t seem to get it cleaned with a water and a towel, well, then it’s probably
time to say goodbye.

v Give
your makeup brushes you decided to keep a deep cleaning treatment. If you don’t do this regularly, it’s
okay – who has time for that anyway?
But since we are cleaning, we’re going to need to do this. Bacteria is gross, so let’s get rid of
it. Rinse off your brushes under the faucet first. If you have brush cleaner, that's great, but if you are like most of the world and you don't, that's okay too because guess what, baby shampoo works just as well. Get in between the brushes and wash off all of that old makeup and be sure to rinse thoroughly under the faucet again. Then leave the brushes to dry standing with the brush side up. EASY!
v Once
you have pulled everything out of your drawer, grab some all purpose cleaner
and give the inside of your drawer a good wipe down. You could be surprised at how nasty the inside of a drawer
can get. It’s okay to feel like
you are actually getting somewhere when you see your nice clean empty drawer –
because you are! If you keep all
of your makeup in a bag, turn it inside out and throw it in the laundry! It may come out looking dramatically
different than the way it went in – in a good way!
v Take
a deep breath.
v Before
you start putting things back in, grab a pen and a piece of paper. Time to make a list. What is it that you threw out that you
need to replace? New foundation
brush? Write it down. Got rid of that nasty old pencil
sharpener? Write it down. Need that favorite shade of lipstick
you had four old tubes of? Write
it down. As you take inventory of
what you have left after the mass excavation, remember – the goal is to keep it
simple. If you got rid of really
old things you have had forever, there was a reason for it. Only replace the things you have
actually used to death. Don’t put
anything on your list that strays away from the basics.
ORGANIZING & STORAGE
Finally, you are ready to start putting things away – in a
NICE and ORDERLY fashion. If you
throw it all back in the drawer again – you will probably be back to square one
in a matter of weeks.
v If
your drawer is deep enough, it’s worth it to get little storage containers to
separate different compartments in your makeup drawer. You can find these almost anywhere
(Target, Big Lots, Container Store).
If you don’t have them – put them on your list!
 |
| CONTAINER STORE $6.99 - $9.99 |
 |
| TARGET $8.99 |
v DO
NOT put your makeup brushes back in the drawer! The best way to store you brushes is standing upright in a
cup of some sort with the brush end up.
You can get creative with how you do this to match your style or the
style of your bathroom. To the right is a
fun and cute way I store my makeup brushes that my cousin showed me. It’s important to take good care of
your brushes so you don’t have to end up throwing them out again the next time
you do this.
v Once
you have put all of your makeup back into your drawer in an organized way that
makes sense to you, do one more overall check of what you need. I consider myself a minimalist with
makeup, so my overall checklist for my daily routine may be different from
yours, but I tried to make a list for you that may encompass the basics of what
you may need in your makeup drawer.
THE “BASICS” LIST
1. Concealer (lighter than your skin color)
2. Foundation (one for winter, one for summer)
3. 1 shade of blush
4. 1 bronzer
5. 3-5 shades of eyeshadow (go with natural tones, one with
a little shimmer, and at least one dark color for smoky eyes)
6. 2 eyeliner pencils (at the MOST)
7. 1 mascara
8. 1 eyebrow pencil (if you use it)
9. 1 lip liner pencil (if you use it)
10. 3 tubes of lipstick (colors you will actually wear!)
11. 1 blush brush
12. 1 concealer brush
13. 1 foundation brush
14. 1 bronzer brush
15. 2 eyeshadow brushes (one that’s a little softer, and one
that is tighter for a more controlled application)
Now I know this isn’t everything, but if you are working
from the ground up – this is a good place to start.
REPLENISHING
Now the fun part: SHOPPING! The most satisfying thing about cleaning out your old makeup
drawer is getting shiny new replacements!
SO WORTH IT!!!!!
Come up with a budget that works for you – but remember it’s
okay to splurge because you will only do this once a year (if that). So, whether your budget is anywhere
from $50 - $250 dollars, look at your list and decide what items you really
want to put your money towards.
Your “big ticket” items to splurge on should be the things
you use the most like your foundation and foundation brush, your favorite go to
eyeliner, an everyday color eyeshadow, and your favorite lipstick. EVERYONE is different so find out what
works for you! Or, you could always come in and talk to Erin, who is always willing to help you figure out a good daily makeup routine for the look you want (for free!).
Hope you feel inspired enough to get at it! This is just an outline to get you
moving, but do it however you want…the bottom line is, your are cleaning and
simplifying. At the end of the day
you may feel beautiful just because you got something productive done. After all, it wouldn’t be Spring
without a little bit of SPRING CLEANING, wouldn’t it? Tis’ the season!
Enjoy!